¶ I hate changing tires. They are a pain in the rear, or front, as the case may be. I charge way too much money to change a tire or tube in hope that they will take it somewhere else. If you have a tire changing machine, it's real easy. I'm poor. I don't have a machine. I have tire irons, a bad back, and a weak mind. The best way to change a tire or tube is to take it to someone else and have them do it. But you want to do it yourself, don't you?...and I'll bet you don't want a hole in the tube either.
There are a number of secrets to changing tires and tubes without putting a hole in the tube.
- You need the right Tire Irons.

- Lube of some sort.
- A breezer tire tool.

- A bead breaker of some kind.

- Compressed air (politicians should have no trouble with this.)
- Something to expand the bead (if necessary)


and, finally, - A little bit of knowledge.
Here is the drill. Let the air out by removing the valve stem with a valve stem tool. Support the wheel. I use a 30 gallon steel oil drum with the top cut out. (It doubles as a trash can) Break the bead loose on both sides. This can be easy (hand pressure alone) or hard (get the bead breaker out, a big vice will work too).
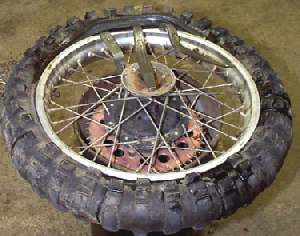
With two the tire irons lever the bead over the rim, and work your way around the rim of the wheel. Most times, I also use a third, little tire iron I have to help out. It has cut outs that fit onto the spokes. Some lube, or soapy water will help too. Then pull the tube, if it has one, out.
Then lever the other bead off the wheel rim and it is off. Sounds so easy, doesn't it... and it can be. Just remember to push the bead opposite the bead you are working on, down into the center of the wheel rim.
This allows the bead you are working on to easily slip over the wheel rim. To get the new tire on ... reverse the process. Remember, some tires have a directional arrow. Make sure the arrow, if there is one, is pointed in the direction of the forward rotation of the wheel. Got that? The way it normally spins. Don't install it backwards.
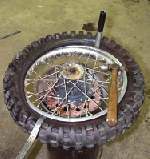 Now comes the fun part. After putting the tube in and aligning the balance mark (light spot) on the tire with the valve stem hole, install the valve stem nut and the valve stem. Add just a little air to the tube. That is so the tube has a little shape to it and is harder to pinch with the tire tools. Lube and push the bead on one side down into the center of the wheel rim and use one tire iron to keep it from coming out. On the side of the
wheel, use the Breezer tire tool, and start levering the tire bead over the wheel rim in very small "bites". Maybe one or two inches at a time. Each time you move the Breezer, work the bead opposite the Breezer, deeper into the center of the rim. BEING CAREFUL NOT TO PINCH THE TUBE. Tap the breezer gently with a hammer, if necessary, to move it around the rim, but do not use a "cheater" lever on the
end of the breezer, it can break. (Don't ask, Don't ask) Add some more lube all the way around the bead on both sides, make sure the valve stem is pointed toward the axle, air it up and you're done. Make sure the bead seats fully on the rim, if not let the air out, relube and air it up again. Only use
NEVER PATCH A MOTORCYCLE TUBE
REPLACE IT.
YOU ONLY HAVE TWO WHEELS
AND ONE LIFE.
Now if you have a tubeless tire, just lever that dog on, air it up and you are done...right? Well, maybe....and then again, maybe not. Many times there is a gap between the bead and the rim. You either use a Bead Expander
to expand the bead till it touches the rim, or a Rubber Donut to fill in the gap between the bead and the rim. It seems the rubber donuts are getting hard to find and they share the problem bead expanders have... they are all a bit pricey if you are only doing a few tires. Another method is to tie a rope around the tire and make a loop in the rope. Stick a long screw driver in the loop and twist it round and round. This tightens the rope on the tire, expanding the bead. Most times anyway. A large volume air tank and large hoses on your air compressor or a special air tank can help too. If you can put in a lot of air fast, it can literally blow the tire bead onto the rim. Sometimes this is the only way to get the big ATC tires to seat. Getting the tire to hold air so it will seat the bead to the rim can be... well, just a lot of fun.
O yeah, most dirt bikes have rim locks to keep the rim from turning on the bead and ripping the valve stem out when you run low tire pressure. They are a necessary pain in the rear. You just have to work the bead in around them.
Make sure the rubber rim strip, that big rubber band that covers the spoke nipple ends, is in good condition. If you don't have or can't get a rim strip, a couple of wraps of duct tape works great.
Whenever you air up a tire or check tire pressures, always put a little soapy water on the end of the stem. This is to check for air leakage from the stem core. If it leaks, retighten or replace it. I have found the valve stem cores rarely go bad. They just sometimes don't like the stem they are put in. If one leaks a bit replace it with another one and save the old one. Odds are it will like the next stem it is put in and hold air. There are two different styles, a long and a short, but they all seem to fit. Go figure.


TIRE SPECIFICATIONS
As if that wasn't enough, there are lots of different types of valve stems.
For those, Click HERE
Don't know what size tire you have?
To read the size codes, on the sidewall of the tire, simply Click HERE
Most tires have a marker in the tread grooves. When the tread wears down to the marker, replace the tire. To find the marker, look for a small triangle on the side of the tire. This triangle will be pointing to the marker. There may be several on each tire.
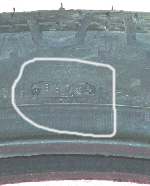 Tires have a date code, cast into the side of the tire. The last four numbers give the week and the year that the tire was made. This tire was made in the 39th week of 2002. It's only good for the current decade, but that's better then nothing.
Never mix Bias and Radial tires.
Always replace the tube, if it has one, with a new one.
New tires have a coating on them. This is a mold release coating. It let's the tire pop out of the tire mold easily. It also makes the tire slippery for a while, till it wears off. This process takes, maybe, 50 to 100 miles. Take things easy till the mold release is worn off. Using Goo Gone cleaner on new tires seems to help too.
All manufacturers say replace a tubeless tire and not patch it. That's the official word. Unofficially, I don't see why you can't patch the tire, put a new tube in it and drive on. You decide.
OK, what tire pressure should we use. We know what the maximum tire pressure is, it's the MAX PSI listed on the side of almost every tire. But what if we aren't carrying the maximum load? Your owners manual will list a general tire pressure that is good enough for most uses. If we ride at hi high speeds we want to add a few PSI. BMW tells us "For sustained speeds over 100 MPH, add three PSI." But what if we don't go quite that fast and carry more weight than normal, but not the Max? A long time ago, while touring, I met a BMW dealer. He was also on tour. He told me a tire rep he knew, gave him a formula to find the right tire pressure. The drill was this. With the tire cold, take the tire pressure. Now ride for 15 minutes or so at freeway speed. Stop and take the pressure again. If the pressure has gone up more than three PSI the tire pressure is too low. This allows the tire to heat up too much, raising it's pressure. If it's the same, the tire pressure is too high. It's not allowing the tire to warm up right. If it's hot pressure is three PSI higher than it's cold pressure, the cold pressure is correct. The tire is the correct temperature and all is right with the world. It's a bit of a hassle, but sounds logical to me. If you are a big tire master with one of the tire manufacturers and have a better way, let me know.
Now on wheel balancing. If you have a machine or can get access to one I'm sure it's a great Idea to rebalance the wheel. So the official word is do it. But, well, I ah... well, I never do. I ride an old BMW 750cc twin. In my younger days I liked to tour a lot. My cruising RPM was was 5000. This is about 90 MPH (yes, I know, bad boy, bad.) More than once I was able to cruise at 105 or so. (Yes, again, bad boy.) By cruising, I mean spending several hours or more at these speeds. I have never balanced my wheels. I kinda figured BMW did it. If it works don't fix it. I've used many different makes of tires and I have just never had any trouble with vibration. My BMW has over 100,000 miles on it. It's your bike, if it vibrates, balance it. If it don't... well, you decide.


 |
 |
Copyright © 1999-2002 dansmc.com. All rights reserved.
