¶ Sooner or later you are going to have to join two wires together. You want to add some lights or a wire gets damaged. Lots of reasons to do it. The big question is exactly how do we do it. There are actually only two ways to do it. The right way, soldering the wires, or the almost right way, which includes all the other ways. Clear as mud, right? Ok, this is what I mean. The best way, the way all the factories use, is to solder the wires together. This makes a strong, electrically sound connection. However, there are other ways that, in my experience, work almost as good. Let's start with the best method, Soldering.
Before you start you MUST have eye protection. Any moisture in a wire will EXPLODE into steam and send the hot, molten, solder into your face. Trust me... it will hurt.
WEAR EYE and FACE PROTECTION.
If you don't, that's OK, I don't care... It's not my eyes or face!
 Soldering means you melt a lead-tin metal mix and use it to connect two other pieces of metal. For our purposes those two pieces of metal are copper wire. They tell me that rosin core solder is best for soldering electrical connections. This may be true for new wire, but we will seldom be working with new. Most times, at least one of the wires is old and somewhat corroded. Sometimes corroded wire just will not take the solder, but there is a cure.
Let's start with the basics. The drill is this.
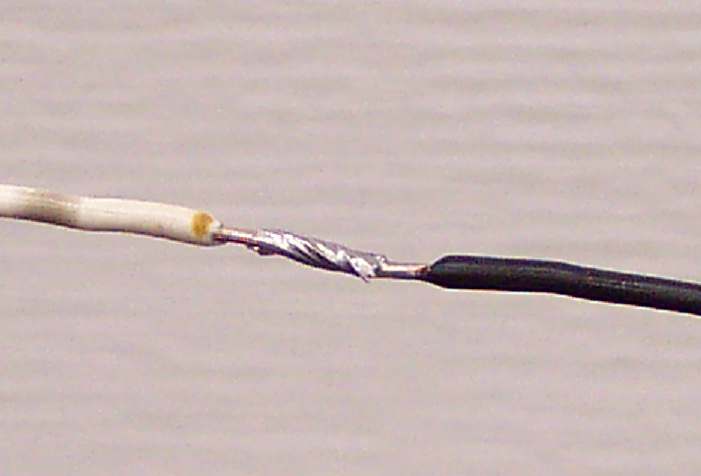
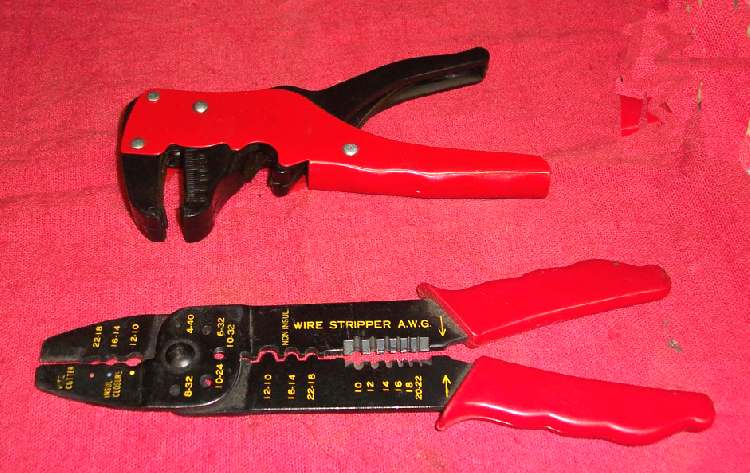
- Strip the wire of all insulation back as far (usually about 3/4"-1") as you need from the end to be soldered. Do this to both wires to be soldered.
- If you are going to use heat shrink tubing for insulation, put a length of it on the wire now.
- Twist the wires together.
- Apply some flux to twisted ends of wire.
- Apply heat to the twisted tire with some kind of heat source, like a soldering iron or gun.
- Touch the twisted wire with the solder as you heat it up. The solder will melt and flow into and between the twisted wire. When the solder looks good (nice and smooth, not balled up or with gaps in it), your done!

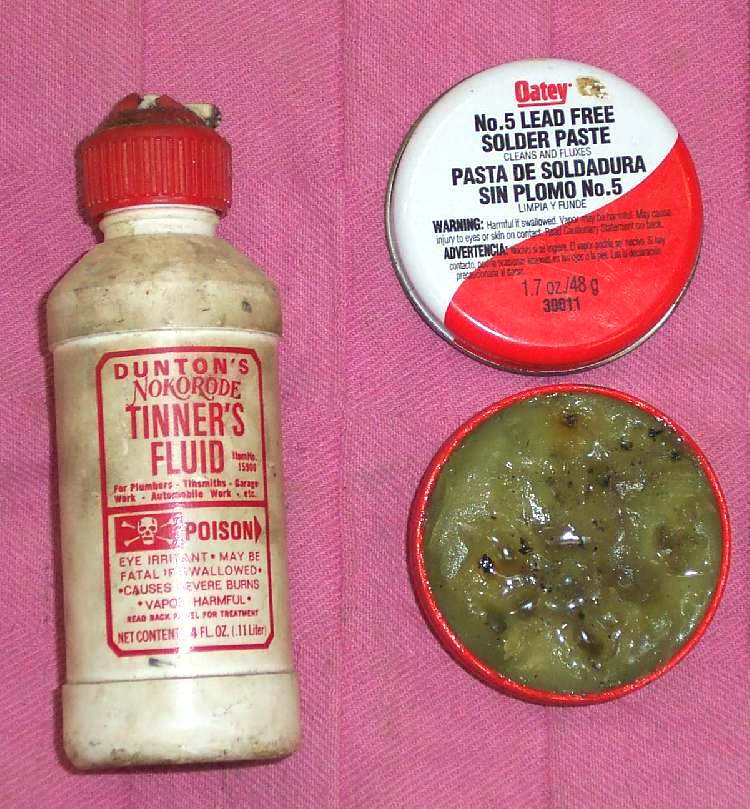 Sounds so easy doesn't it? But not always! Sometimes it works and sometimes it doesn't. On these times, the solder just will not stick. It won't "Flow". It balls up and looks bad. What to do now? If the wire is very badly corroded, take a knife or some sand paper and work over that wire. Scrape and/or sand all the corrosion off the wire. Now reflux the wire and try to solder it again. You will now find your success rate will now go up quite a bit, but every once in a while the solder just will not bond to the wire. When you run into the real nasties, there is only one cure... Acid. It's usually called "Tinners Fluid" and it contains Hydrochloric Acid and Zinc Chloride. Make sure you have your safety glasses on and remember it's acid and will burn you. With acid I'd say your success rate will be real close to 100%. If it looks real nice, with smooth flowing lines, you are good to go.
If you have a new tip on your soldering gun, or the old one has a dirty tip you will need to tin and/or clean it. I do this by heating up the tip, dip it in the flux (It will smoke!) and then putting a bit of new solder on it. I also like to keep a small jar of water near and dip the hot tip in it every once in a while. This pops the slag off the end of the tip. Some guys use a wet sponge. If you get too much solder on your project or want to get the old solder off, you can use a solder sucker. This is just a squeeze bulb that quickly sucks the excess solder away. Just keep the solder molten and suck away!
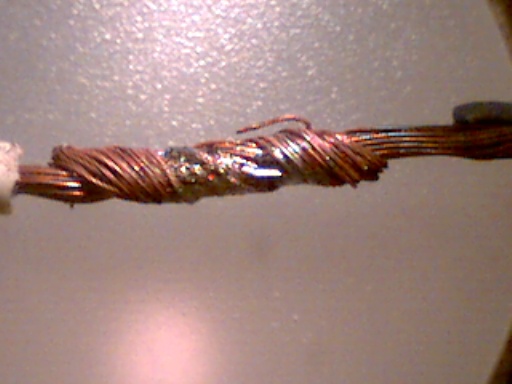
You can see how smooth and flowing the solder is between the wire... kinda, sorta anyway.
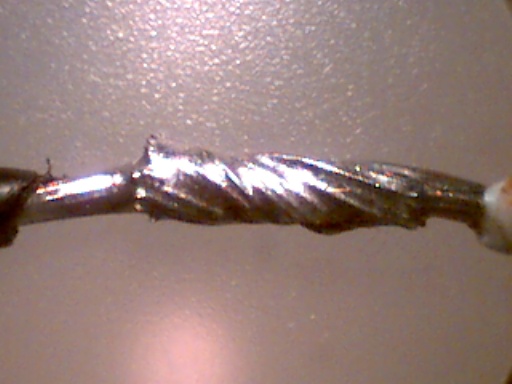 10 X A Good Solder Job. |
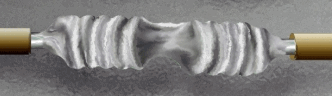
 60 X A Good Solder Job. |
Redo with some Tinners Fluid.
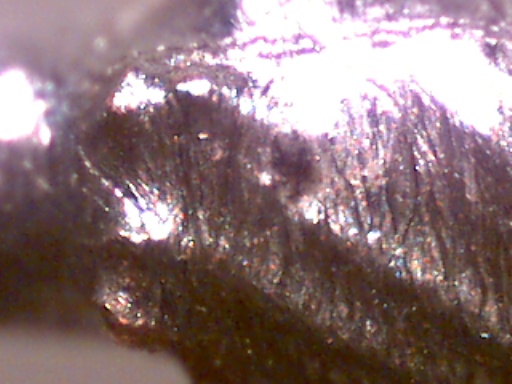
 10 X A Bad Solder Job. |
 60 X A Bad Solder Job. |
If you are really into pretty, check out what is known as a Western Union/Lineman Splice.
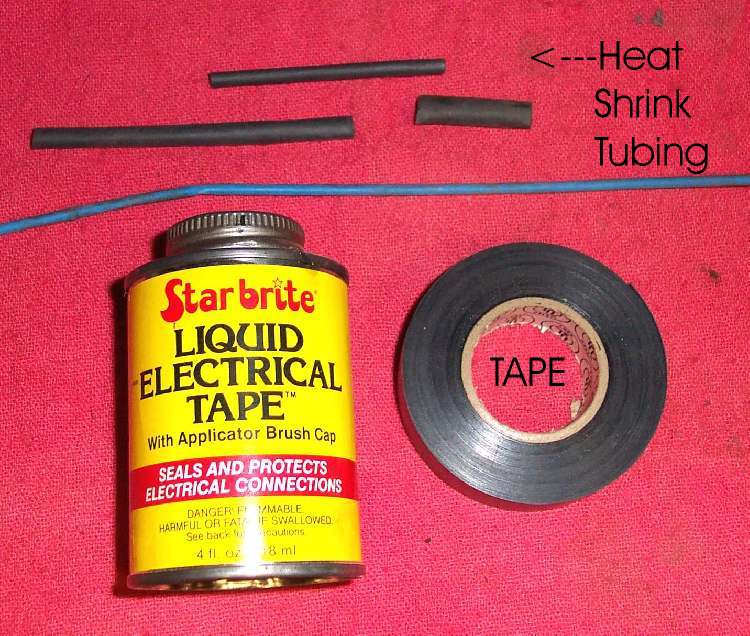 Once the solder job is complete all it takes is a bit of insulating to complete the repair. Wrapping the bare, soldered, connection with electricians tape. This works pretty good but does look messy. The neatest looking insulation is heat shrink tubing. Simply pull the tubing over the joint and heat it with a flame from a lighter or match. When heated the tubing shrinks giving the repair a nice neat look. There's also other types of insulation like "Liquid Electrical Tape" and it does, indeed, work. However, it's not real neat looking. Me? I really like the heat shrink tubing.
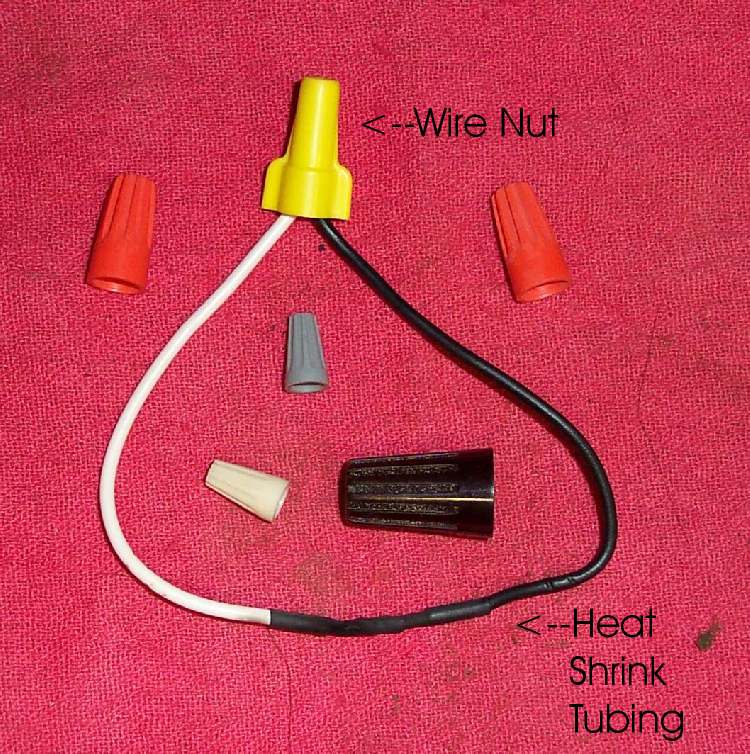 A less pretty way to join two wires is with wire nuts. Wire nuts are just that... nuts that hold wires together. They come in lots of sizes. Just pick one that fits the size (Gauge) of wire you are working with, put the wires together and screw the wire nut on. This works very well. In fact you will find that a lot of the wiring in your house is held together with wire nuts. Not too pretty, but it does work well.
 Another way of connecting wires is by crimping the wire in a wire fitting. You can get lots of different types of fittings. Fittings that connect three or more wires. Fittings that plug into other fittings. Fittings to clamp the wire to a nut or bolt. You can use special pliers to crimp these fittings to the wire or you can solder the wire to the fittings. Like wire nuts, I consider these crimped fittings to be rather gross, but I got to admit, they work well and, all in all, are reliable. They just don't look neat like a soldered fitting.
Last and certainly least, is a way I DO NOT recommend. DO NOT do it this way. I hate to admit this, but yes, I have done an evil thing. Once, many years ago, I was touring on my BMW. One of the wires going to my turn signal, on my fairing, pulled loose. So I just got in there and kind of twisted the two wires together, then positioned them so they couldn't ground out. (the fairing was fiber glass, so that was easy.) I was a million miles from nowhere and I had no electricians tape. So things weren't even taped. I really meant to fix it right, at the very next town, but, well, I sorta forgot. Every once in a while over the next two, three years and 20-30,000 miles I'd remember and say to myself, "you better fix that and soon." It was just other bikes had to get fixed first and, well, you know. However, it did work till the day I finally got in there and did it right. How's that saying go? Do as I say, not as I do.
"O wretched man that I am! who shall deliver me from the body of this death? I thank God through Jesus Christ our Lord... "
Romans 7:19,24,25
If you want to know how the US Space Agency NASA solders, here is their PDF (114 pages) on it.
 |
 |
Copyright © 1999-2013 dansmc.com. All rights reserved.